Two places to set up a KloudEmail Alias, in the KartHost Customer Center or your KloudEmail Control Panel.
In this Tutorial, we will discuss setting up an Email Alias in the KartHost Customer Center..
Assumption:
You are logged into your KartHost Customer Center Account associated with the KloudEmail service you wish to add an Alias.
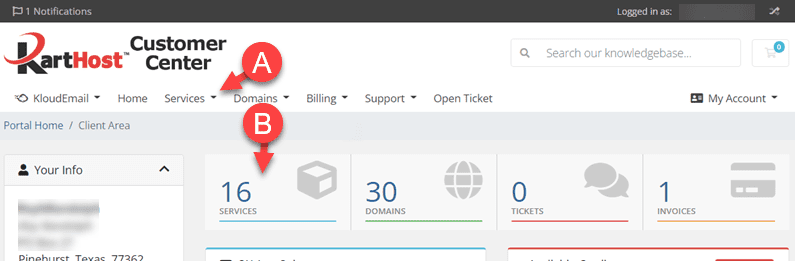
Starting from your KartHost Customer Center Account home page...
[Step 1] (A) Click on Services and then from the resulting drop-down menu click on My Services.
Or, click the (B) SERVICES box.
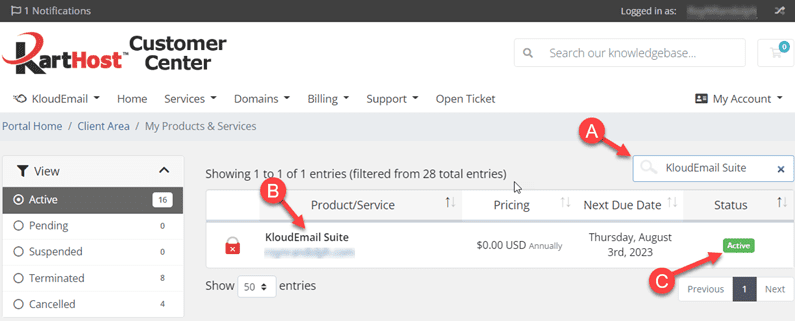
[Step 2] (A) On the "My Products & Services" page you can Search for your product.
(B) Once you find it (if you have multiple types of the same services confirm its the correct domain name)
(C) Click the green Active button.
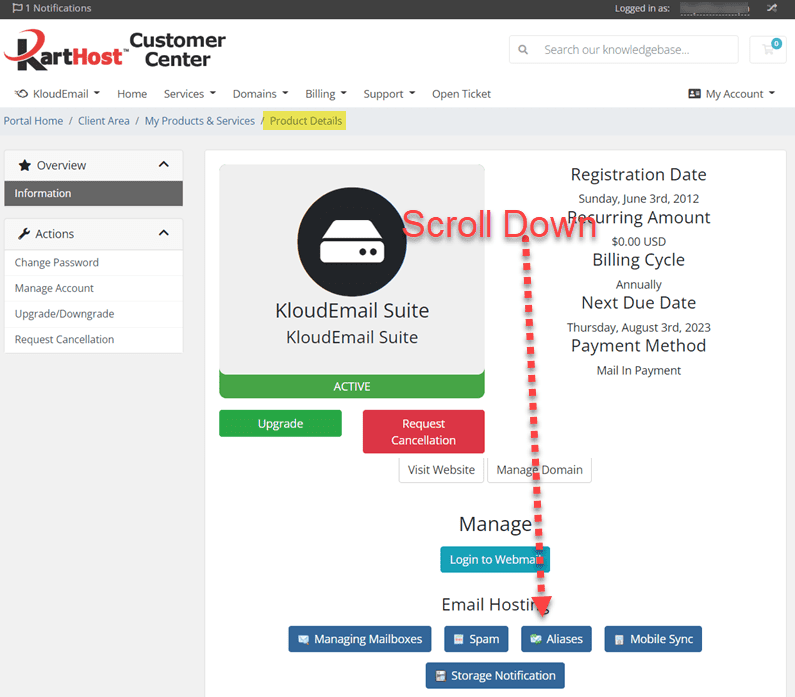
[Step 3] Once you land on the "Product Details" page scroll down until you see the set of blue buttons and click the Aliases button.
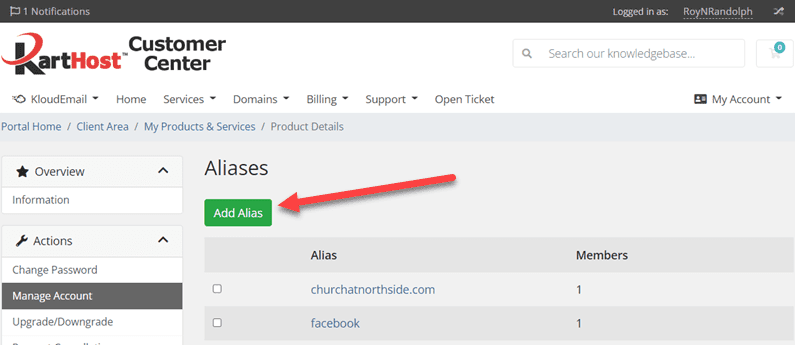
[Step 4] On the Aliases page, you will see a list of previously created email Aliases, and the green Add Alias button. Click the button.
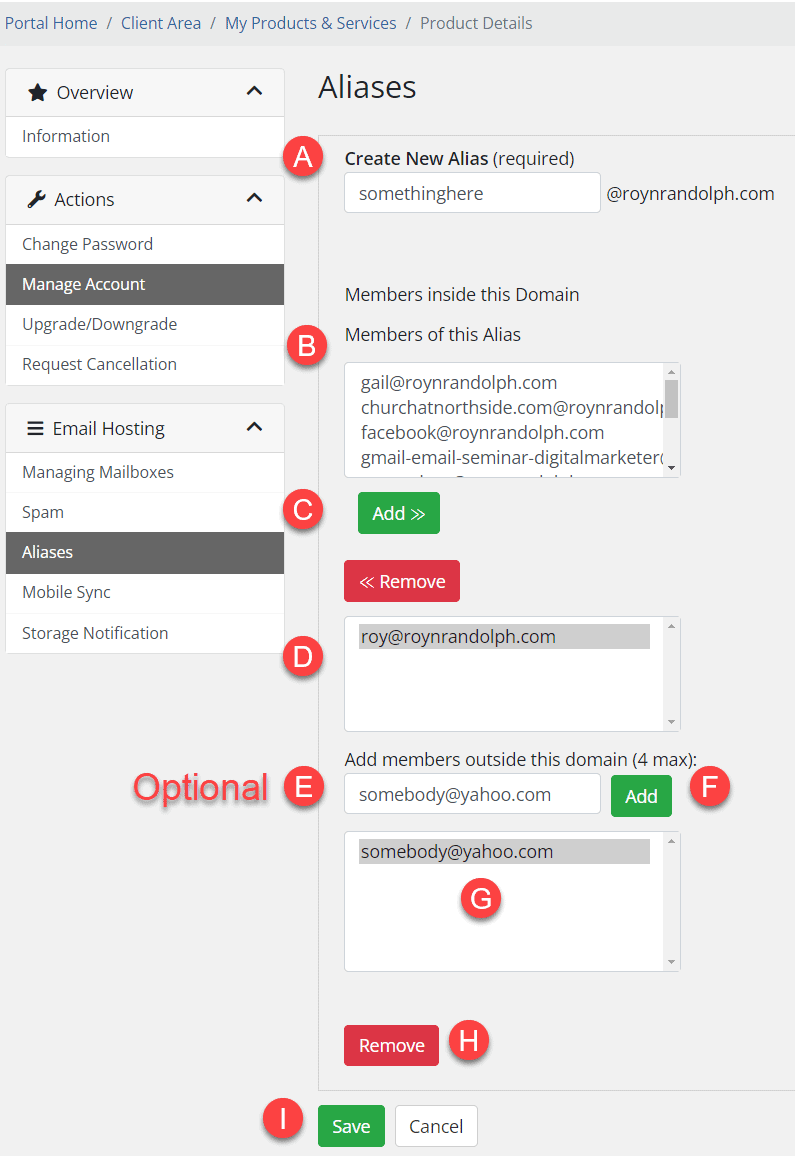
[Step 5] Follow These Steps to Add the Email Alias. Also, know that a "Member" is the email address(es) to be forwarded to. See the image below.
(A) Create your email address here. Fill in the blank field that will be left of the "at" sign"____@".
(B) Select all the "Member(s)" you wish to get a copy of emails sent to your new email alias.
(C) Click the green Add button to add the Members for this Email Alais.
(D) Your list of Members will now be here. Should you ever wish to remove a Member, highlight the Member and click the red "<< Remove" button.
(E) Optional - If you wish to have an email address outside your domain name, add it here.
(F) This outside the domain email address will show here that you added in step E above.
(G) Delete - If you wish to delete an outside the domain email address just highlight the email address in the above step and click the red Remove button.
(H) SAVE your work. If you don't save it never happened. By clicking the green Save button. This will save all the changes you have made.
Congratulations you are all done!
END OF TUTORIAL
Please give us a Thumbs Up, it helps motivate the Team writing up the Tutorials for you!
published August 19, 2022


