How to forward an email as an attachment in the Desktop/Laptop Outlook Email Client and using web based OWA (Outlook Web App).
Both WHY you would need to do this and the How you can do this in in this tutorial.
Note: This procedure isn’t available in the Outlook mobile app for iPhone, iPad, or Android or on Outlook in mobile browsers.
The WHY
There are several reasons why you might want to forward an email as an attachment:
Preserve Original Email: By forwarding an email as an attachment, you can ensure that the recipient receives every part of the original email,
including all attachments and formatting. This can be especially helpful when forwarding business emails, legal documents,
or other important communications that need to be kept intact.
Troubleshooting: In some cases, you may need to forward an email as an attachment for troubleshooting issues such as blacklisting and bounced emails.
Unlike simply forwarding an email, the headers of the original email are preserved when forwarded as an attachment.
Including Attachments from the Original Email: The forwarding feature comes in handy for sharing attachment files from an email you received.
When you forward an email, the attachment files will be sent along with the message.
It skips the hassle of saving the files to your computer, composing a new email, and re-uploading files.
The HOW
Desktop and Laptop Outlook Client
[1] Launch Outlook on your Desktop or Laptop and select the email you want to forward as an attachment by clicking it in the email list.
[2] On the "Home" tab, select the "More" and then select the "Forward as Attachment" from the drop down menu.

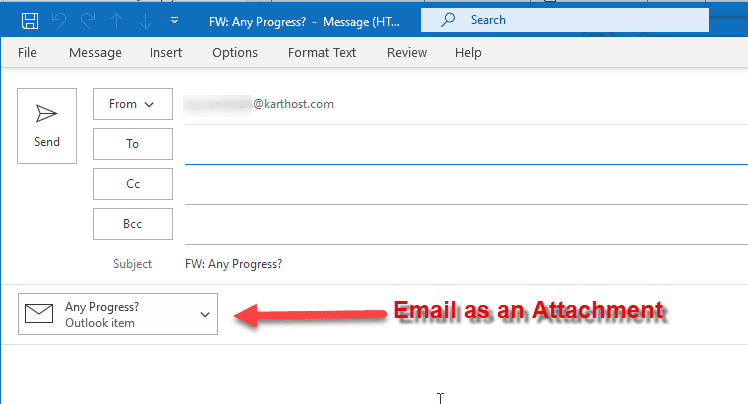
[3] A new compose window will appear with the previously selected email as an attachment.
Now just add the email address you wish to send to and any comments and send.

Using OWA (Outlook Web Access)
[4] Login to your OWA (using your favorite web browser). And then entering your email address and password.
Once in OWA create a new message.
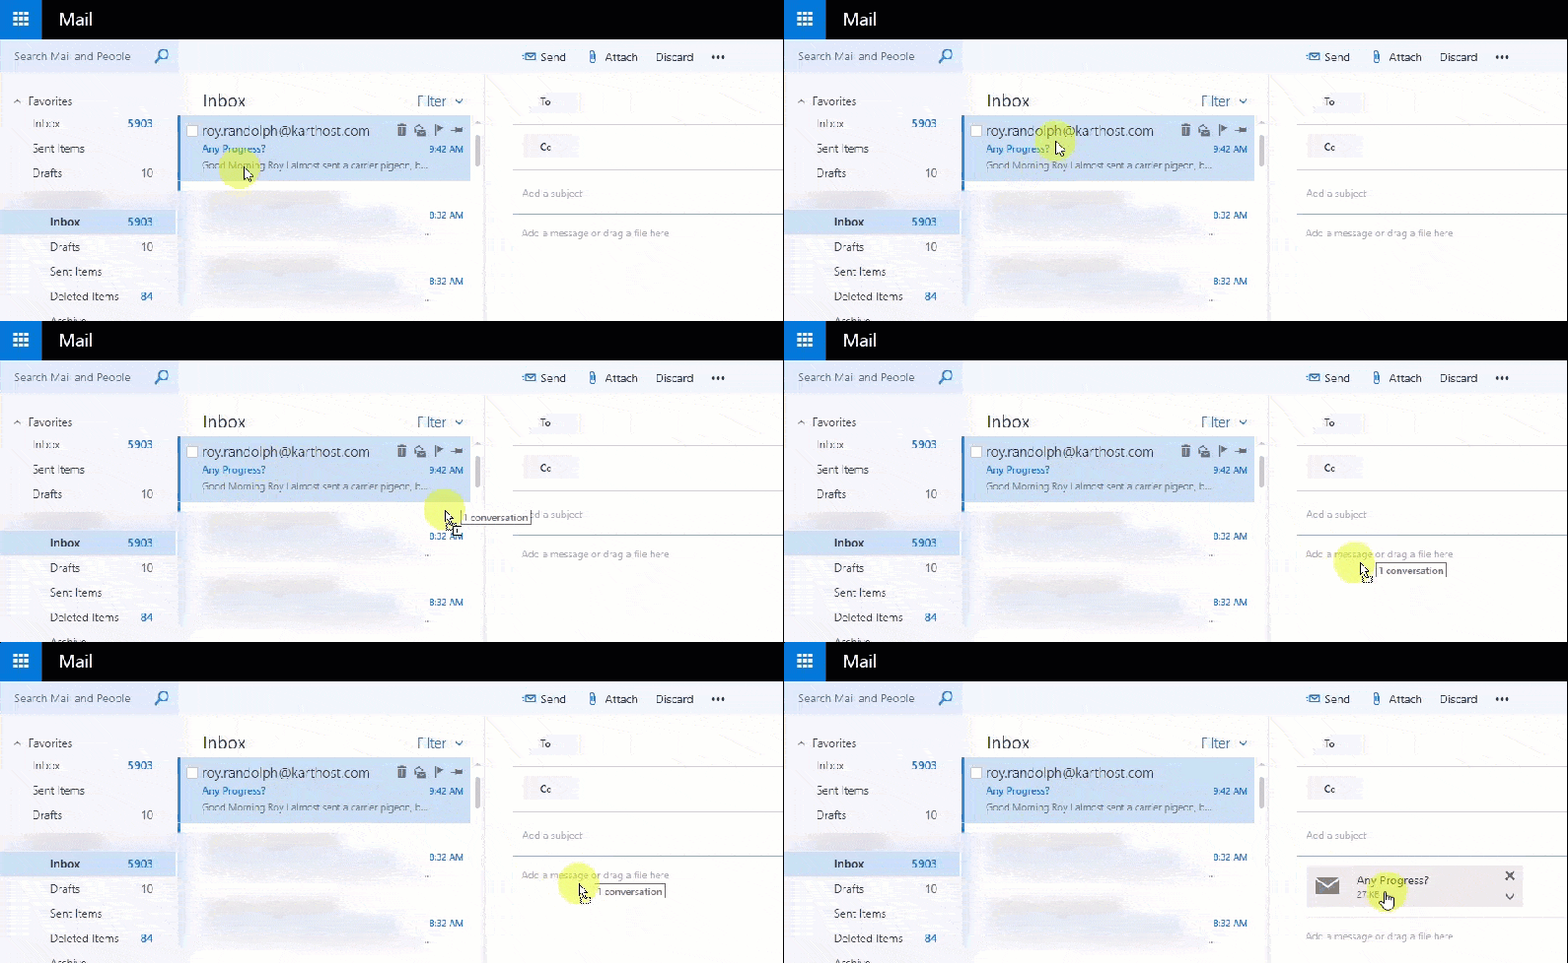
[5] In the Inbox pane (as shown below) drag the email you want to send as an attachment to the new message.
Address your email with any comments/instructions you wish to supply. Then SEND.

End of Tutorial - If you find this tutorial helpful, please give us a Thumbs Up!
First published - October 24, 2023


