NOTE: You must have a Cloudflare account set up before beginning. Go to www.Cloudflare.com and Sign Up for a new account with the domain name you wish to use.
If you wish to use Cloudflare to forward your other domain names to your main domain name (aka Domain Name Forwarding) please review this KartHost Knowledgebase Article: Domain Name Forwarding using Cloudflare.
1) Login to your Cloudflare Account. Once logged in click on "Add site".
2) Type in your domain name (without the “www”) into the A) “Site” box (field). And then B) click "Add Site" button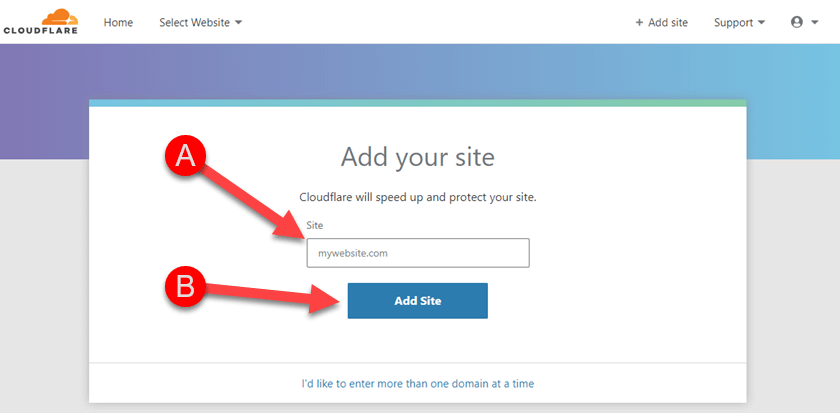
3) The resulting page you will be given what is happening next, take the time to read it and then click the “Next” button.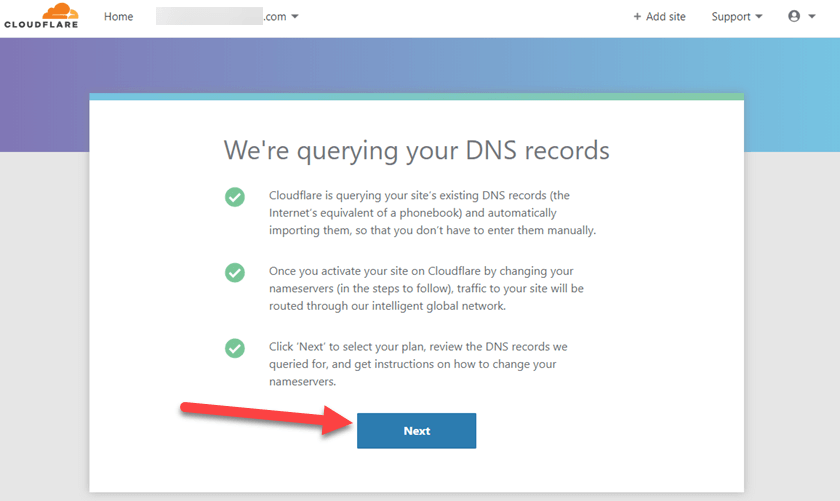
4) The following page will appear, you need to select the type of service you want to use with Cloudflare. A) You can certainly start with the Free plan (In our example, we are clicking the "FREE" plan), but if you choose Pro or Business (or Enterprise) you will be paying Cloudflare, not KartHost. So just mouse over the plan you wish and click. B) Then click "Confirm Plan" button. 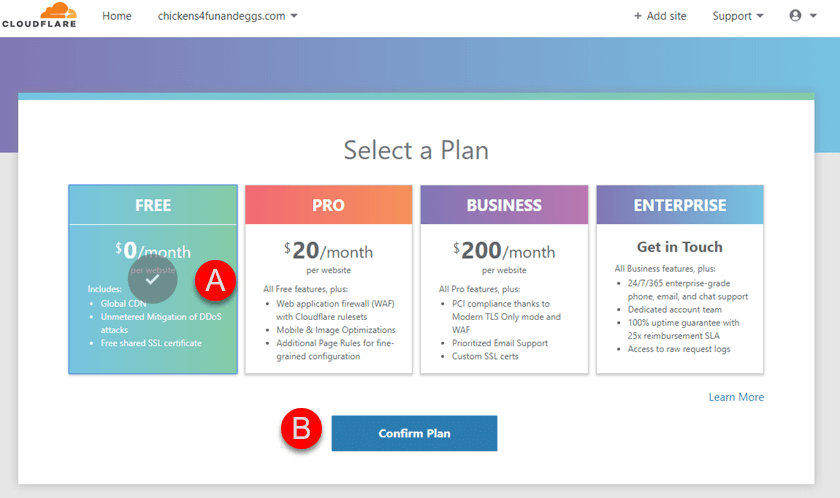
5) You will now need to Confirm your Plan, click the ‘Confirm’ button.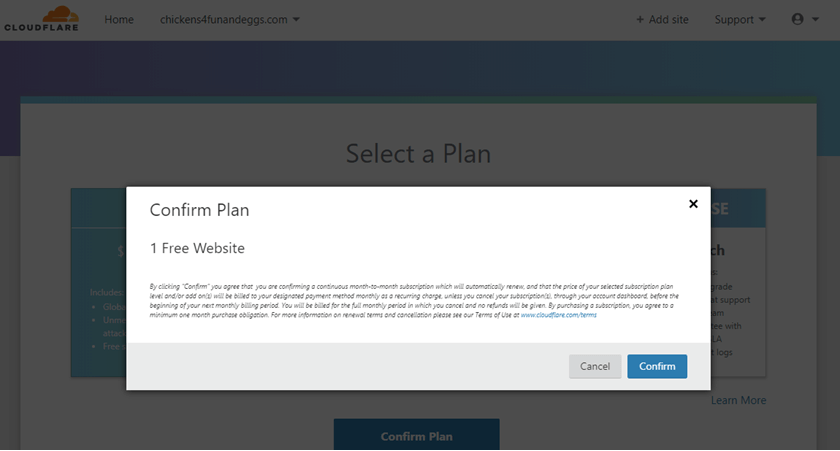
6) The next Step is showing the DNS page. Cloudflare will attempt to retrieve (DIG) for all your DNS entries that exist, however, it might not retrieve all of them. So double check and make any changes now before changing the Name Servers of your domain name to the Cloudflare Name Servers. Once you have your DNS set click the ‘Continue’ button at the bottom of the DNS page.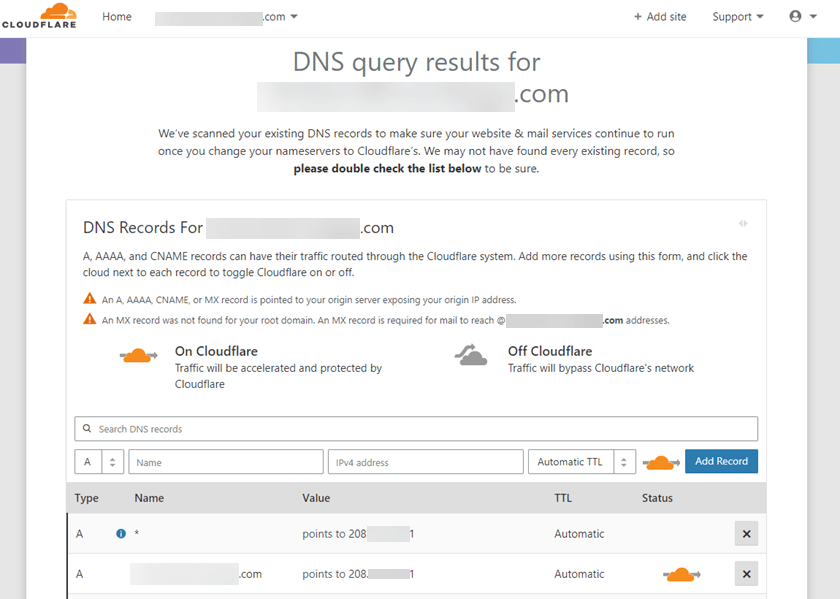
7) The following page is the Name Servers Cloudflare will instruct you to change your name servers too. The name servers in the “From” column will reflect your domains actual current name servers. The name servers in the ‘To’ column is the Cloudflare name server you need to change too. You can click the ‘Continue’ button at any time.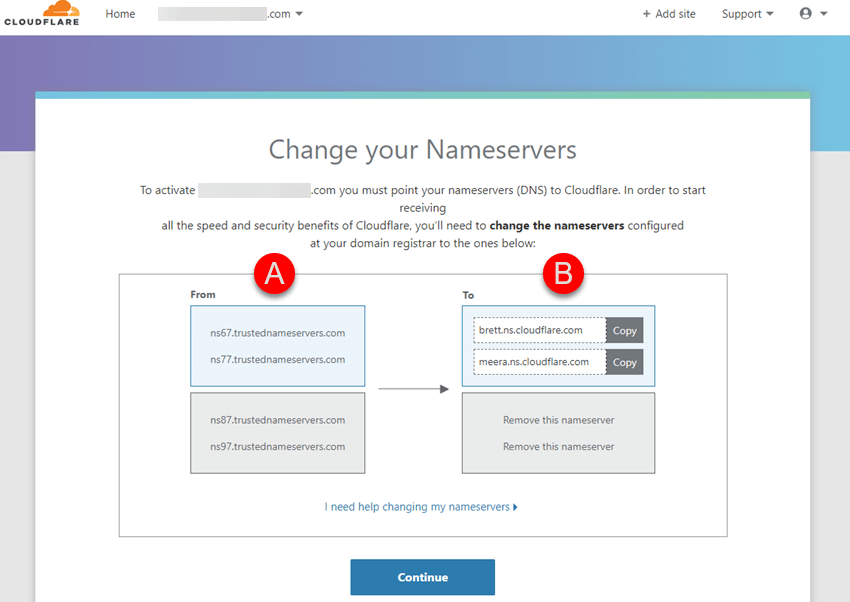
8) After clicking the ‘Continue’ button in step 7 above and If you have changed your domain's nameservers we would recommend you set Cloudflare to “Standyby” until the Cloudflare free SSL Certificate has been generated. This can take up to 24 hours (in rare cases even longer).
To do this click the Advanced link shown in the screenshot below: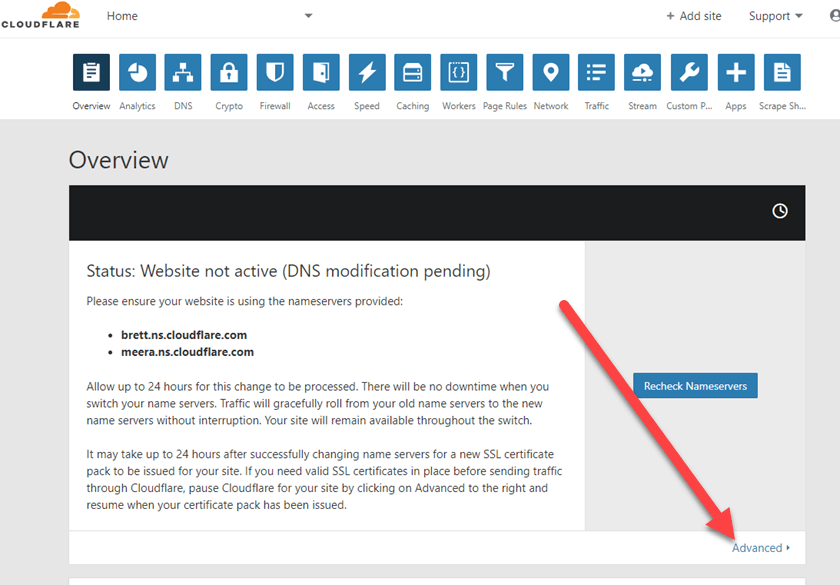
9) After clicking the "Advanced" link, the ‘Pause’ button will be exposed next to Pause Website. The reason you wish to do this is so your site will not go “offline” while the Cloudflare SSL Certificate is being generated.
NOTE: When you click "Pause", you will disconnect and bypass the security Cloudflare provides and be disconnected from the Cloudflare CDN network. However, Cloudflare will continue to handle the DNS.
Just click the ‘Pause’ button as seen in the image in Step 10. 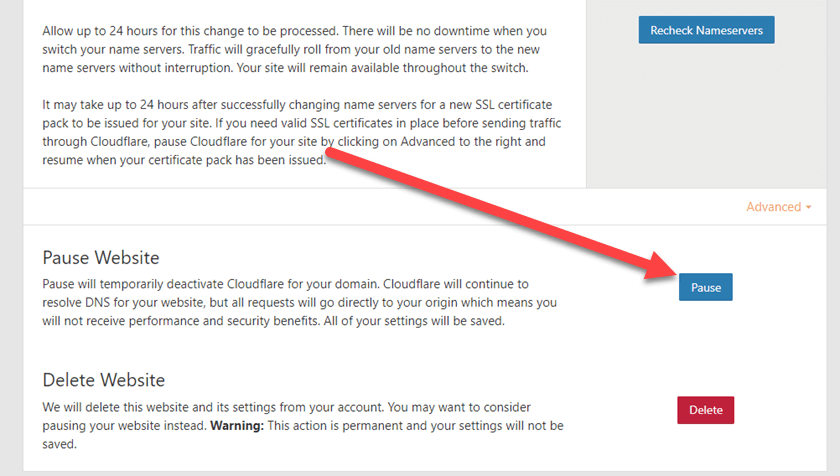
10) You will then see the Confirmation to continue or cancel. In this case, we will want to continue, click the ‘OK’ button.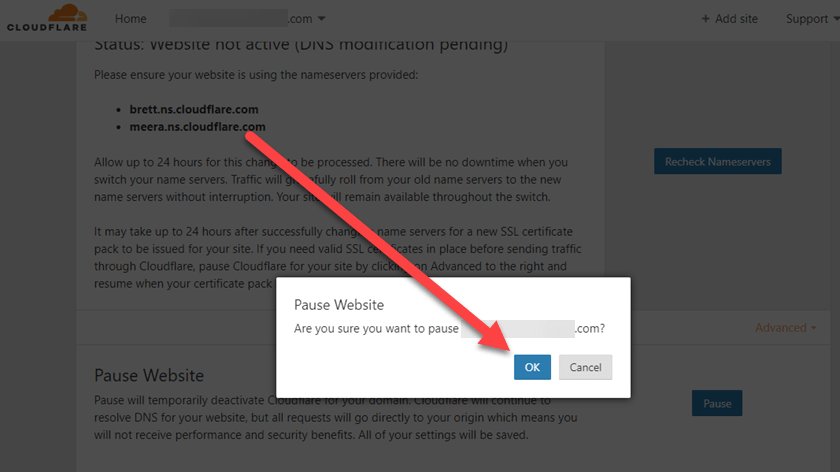
11) You will be taken to the Overview page and you can click at any time the A) "Resume" button to take full advantage of all of Cloudflare's services.
TIP: If your web host provides you a Free SSL Certificate like KartHost does, then make sure the "SSL", as pointed out by arrow B) is showing Full or even more security Full (strict). Make sure it isn’t showing flexible as that can cause some issues if using WordPress.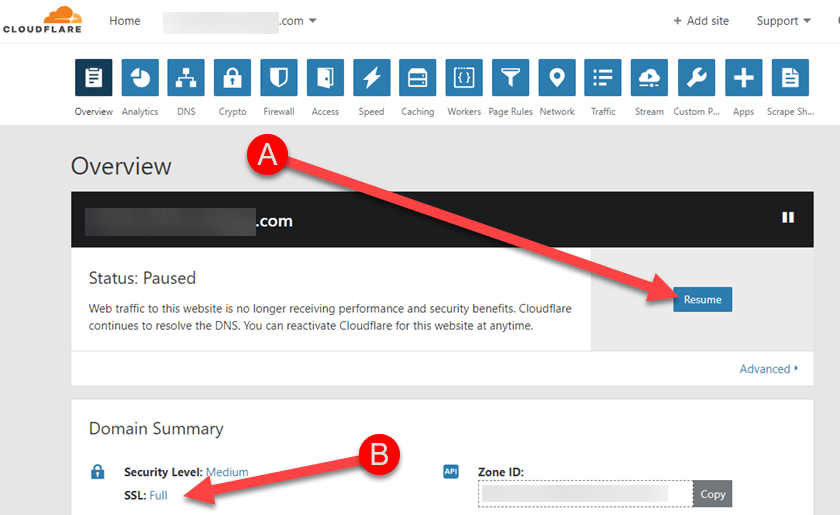
This Concludes setting up your Cloudflare Account.


