Updated October 19, 2018
Customer Center - Changing Email Username on the Product/Service page
KloudEmail Control Panel - Changing Email Username
From time to time, the need to change your KloudEmail (Basic, Suite & Hosted Exchange) username (the part in front of the "@") maybe because a changed employee, you wish to use a different name for your primary email address, or any other reason.
It is very simple to make this change. You can make this change via your Product/Service page in your KartHost Customer Center or if you wish login directly to the KloudEmail Control Panel. In this tutorial, we will go over both.
HOSTED EXCHANGE - Please note you will not be able to manually make any username changes to your KloudEmail Hosted Exchange usernames, while they CAN be changed, you will need to open a KartHost KloudEmail Support Ticket to make the request (see: Open a KartHost Support Ticket - Video) and we will be happy to do this for you.
Customer Center - Changing Email Username on the Product/Service page
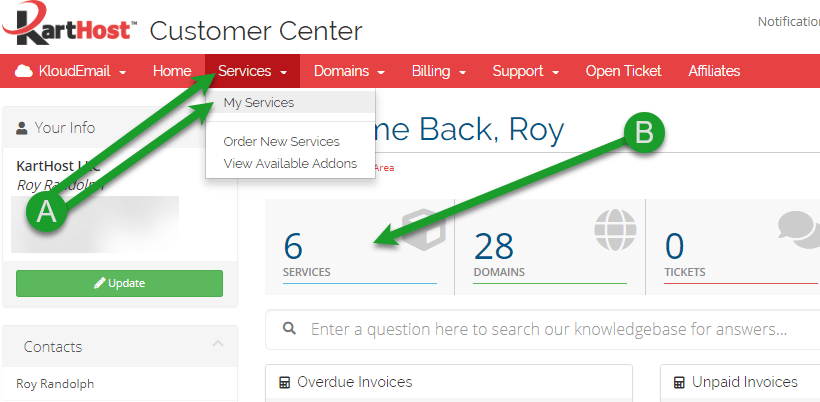
1) We will assume you have logged into your KartHost Customer Center account that holds your specific KloudEmail service. If so, click either A) Services > My Services on the red navigation bar, or B) the SERVICES Box
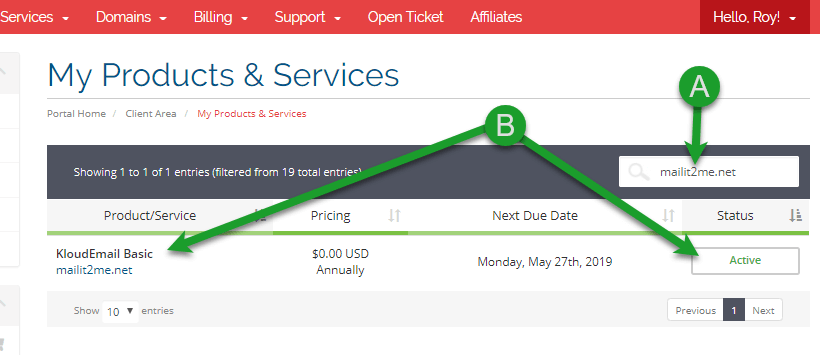
2) Then on the My Products & Services page locate your KloudEmail service ( A) use the search window if you have multiple products) B) click the Active box for the product you wish to manage.
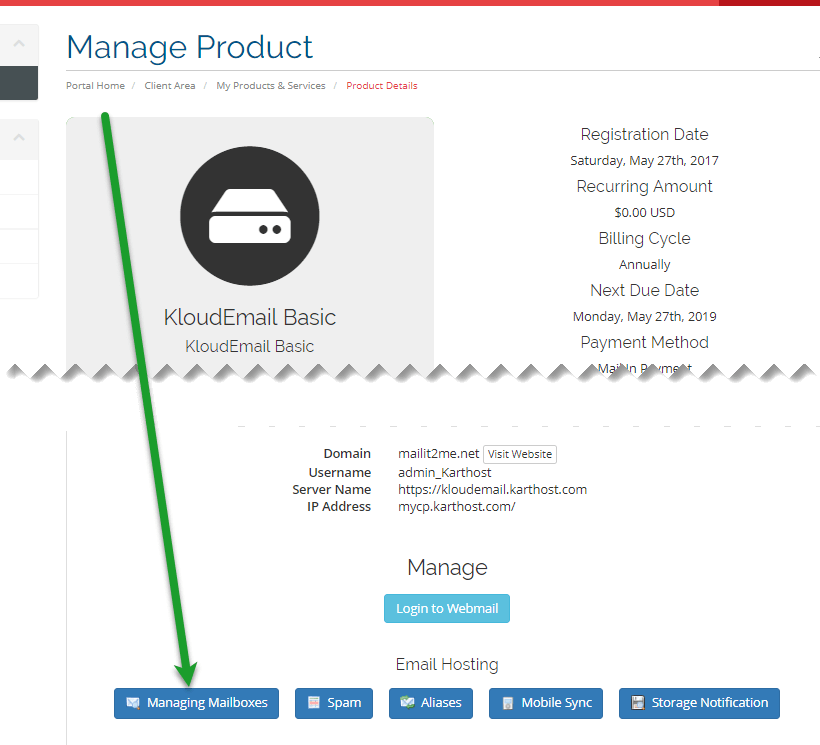
3) On the resulting "Manage Product" page, scroll down until you see the Managing Mailboxes button and click.
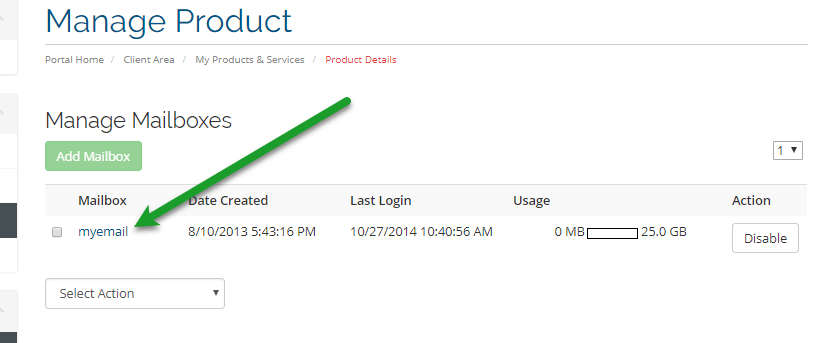
4) On the Manage Mailboxes page (Product Details), you will see all your mailboxes (for this specific domain name) listed here. Click the name in the Mailbox column.
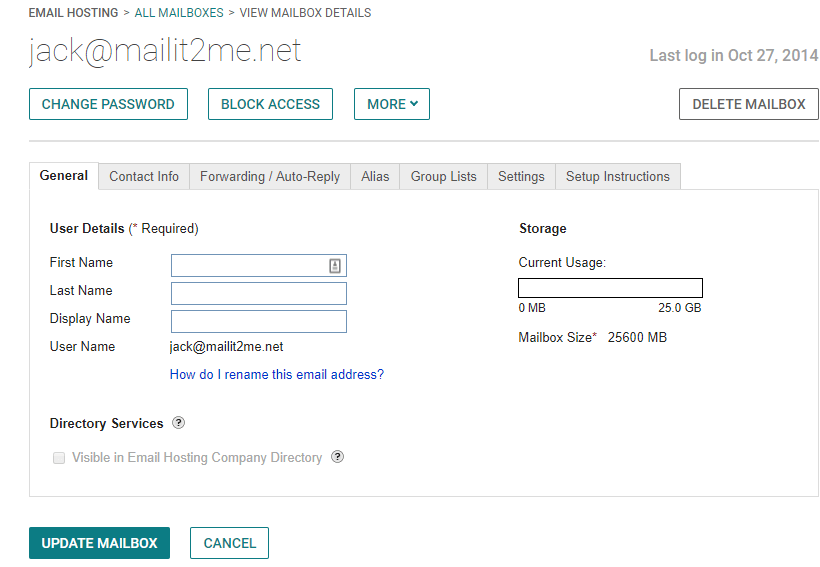
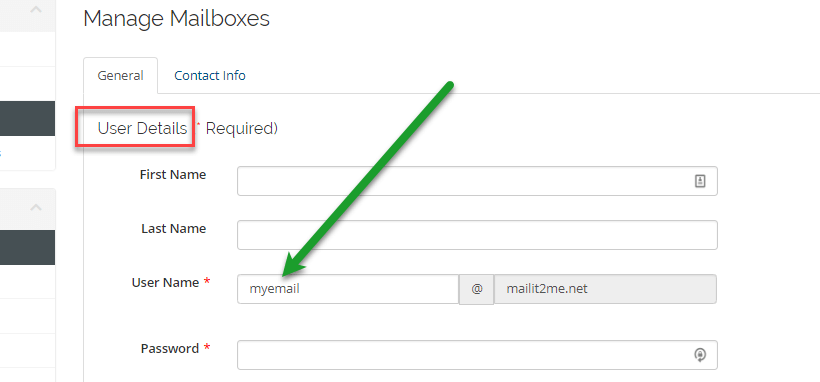
5) On the User Details page, you will see your existing username listed. Simple remove and type in the username you would like (note: it can't already exist already as another email address, Alias, Group etc. on this same domain)
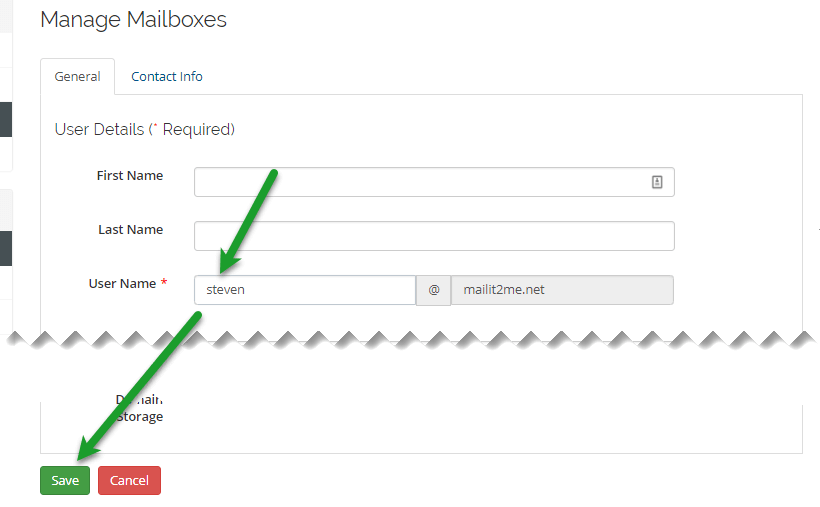
6) Once you have replaced the username with the one you want, scroll down on the page and click the Save button. Allow up to 30 seconds for the process to change to your new username.
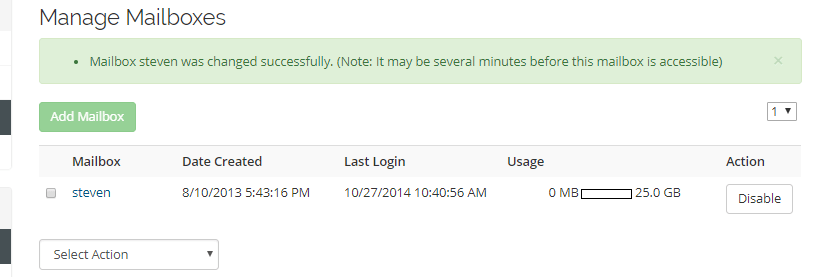
7) Once the Process has completed you will see the green box informing you your change was successful! Congratulations!
From this point forward you will be using your new email address for login purposes to your mailbox. So make sure to make the appropriate mailbox changes to your phones, tablets, Outlook, Mac Mail and other email managers you use to manage your email that connects to this box.
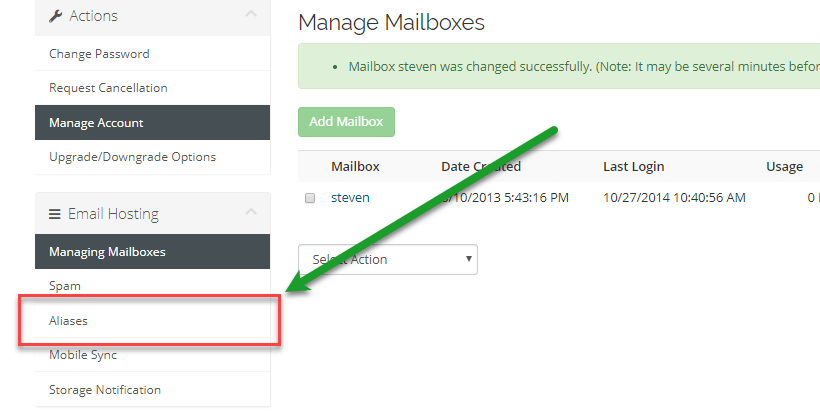
8) After your username has changed, the KloudEmail system will create an email Alias email, to confirm, just click the Aliases link under Email Hosting.
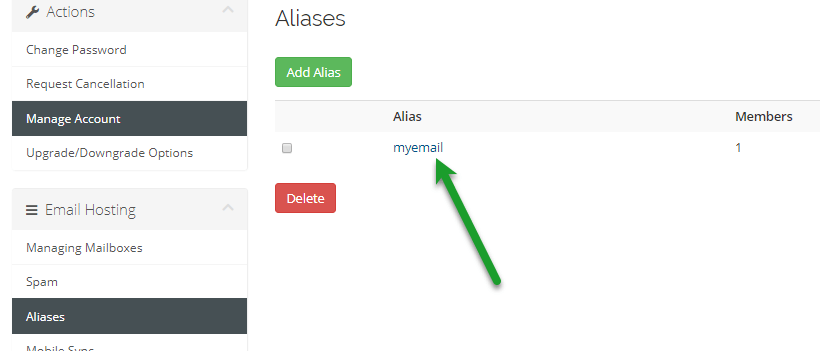
9) Then just click the username for the Alias to manage the email Alias like you would any other email Alias. The Member associated with this Alias is automatically set to the new username of your mailbox you just changed too. From here you can change the Member, add Members, or delete this Alias if there is no need for it.
KloudEmail Control Panel - Changing Email Username
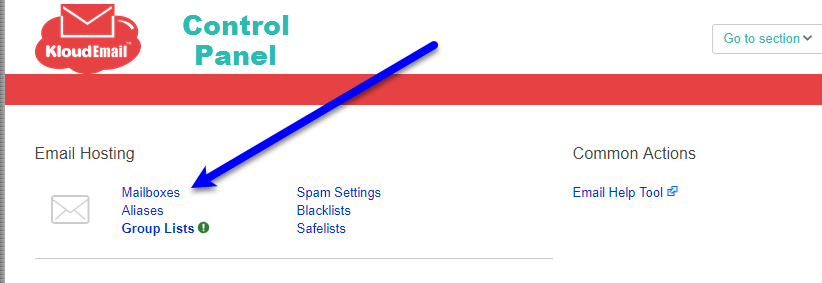
1) You will need to login to the KloudEmail Control Panel. Remember you have a special username (known as an Administrative ID) and password. Once you get logged in, click on Mailboxes
2) If you have more than one domain name associated with your account, select the domain name.

3) Now locate and click the username under the "Mailbox" column in which you wish to change.

4) Now click the A) "More" button and from the drop-down menu B) select "Rename Email Address".

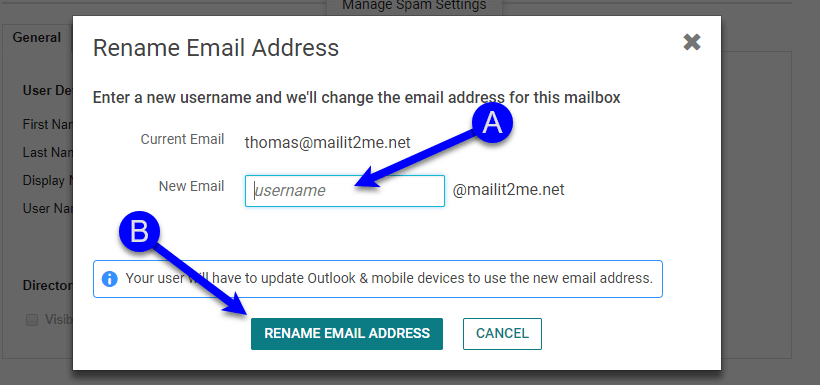
5) A popup window will appear and A) type in the new username you would like the mailbox to become and B) click the RENAME EMAIL ADDRESS button.
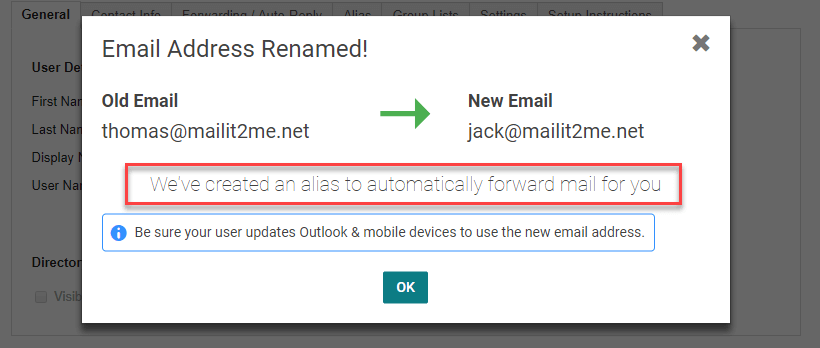
6) The next window you will see is confirmation your old email address was converted to the New Email Address as shown below:
NOTE: Like using the Customer Center the KloudEmail Control Panel will create an Alias and automatically forward to your new email.
Now click the OK button.
7) You are now back on the VIEW MAILBOX DETAILS > General tab > User Details page. You can finish filling out the specifics of the mailbox if you wish. Final action click UPDATE MAILBOX and you are done.
