Permissions, Adding, and Managing a Customer Center Contact.
If you need someone to login to your KartHost Customer Center Account. You will need to Invite Someone as a User to your Account.
User - Adding and Managing a Customer Center User Account
Contacts do not have Login rights to your KartHost Customer Center. However, they can receive emails like invoices, product information emails, and general emails regarding your account.
And if a Contact via Email has opened a KartHost Support Ticket, they can receive the email responses to those tickets. They will not receive responses to Support Tickets they didn't open.
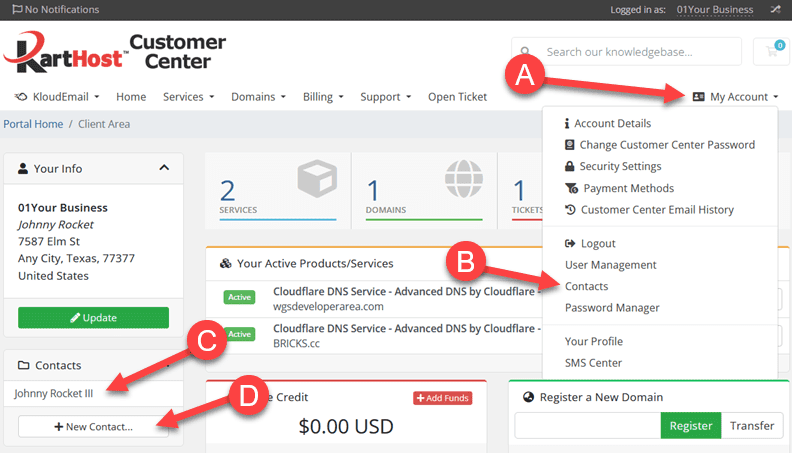
Step 01 - Access Contact to Add New or Manage - (A) Click on My Account and (B) from the drop-down menu click Contacts.
Optional - If on the Dashboard (Home) (C) click any existing Contacts to Manage. (D) Click on + New Contact.
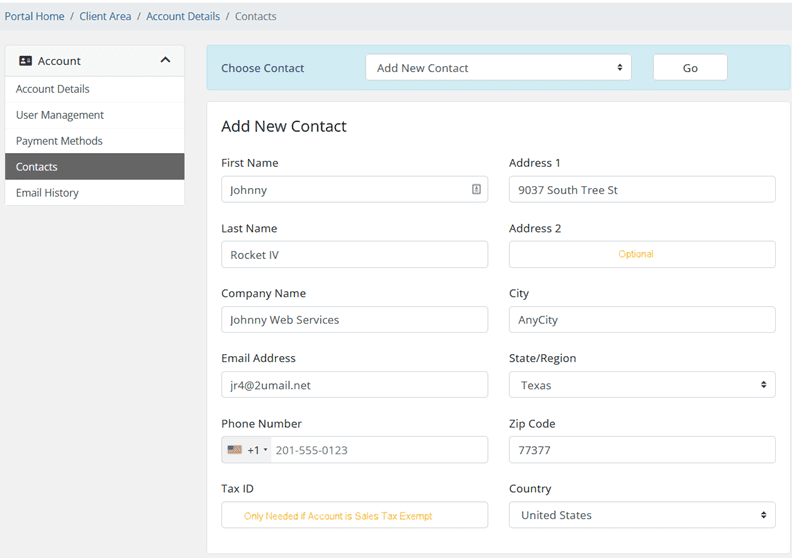
Step 02 - To add a new contact select "Add New Contact and fill in all fields. The Address 2 and Tax ID are Optional.
After the form is filled out move on to Step 3.
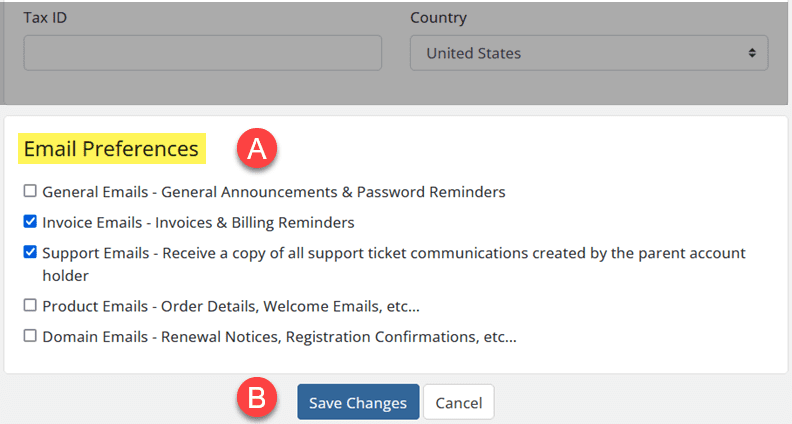
Step 03 - (A) Select the check boxes next to set the Email Notification email categories to send the contact copies of.
IMPORTANT: Support contacts do not receive copies of all support tickets. They can open tickets themselves via
email and will only receive emails when an admin replies to a ticket they opened. The main client will
receive copies of all Support Tickets.
(B) Make sure to click the Save Changes button so you do not lose your settings.
DELETING CONTACT - You will select the Contact which you wish to delete and at bottom of the page you will see
a button that says "Delete Contact".
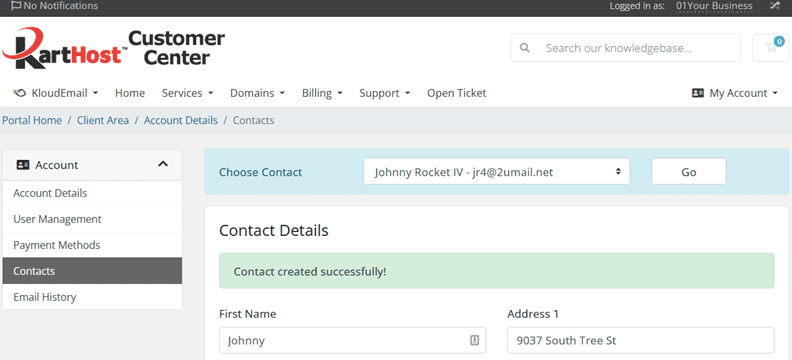
Step 04 - After clicking the Save Changes button, you will see the "Contact created successfully" message.
END OF TUTORIAL
Updated September 18, 2022


