Via the KartHost Customer Center, you can Add or Delete a KloudEmail Basic or KloudEmail Suite mailbox.
Alternatively, if you would like to Add or Delete a mailbox via the KloudEmail Control Panel, see this Tutorial: Add & Delete a New KloudEmail Basic or KloudEmail Suite Mailbox
[A] There are two ways in the KartHost Customer Center to access your area to Add or Delete a Mailbox.
(1) On the Dashboard click the Services block or (2) on the Customer Center main navigation, click on Services > My Services 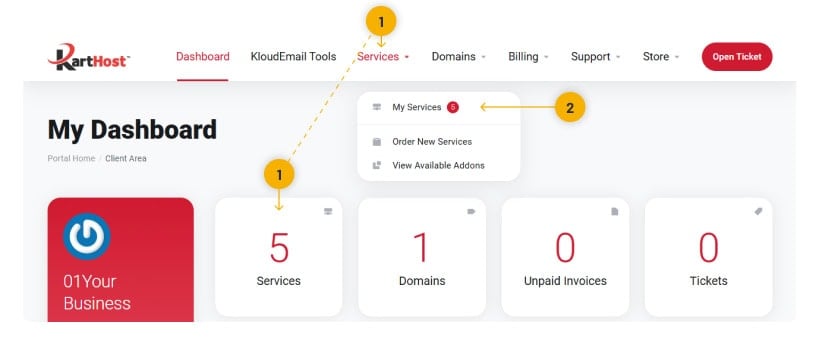
B) The resulting page will be the My Products & Services page. Locate your KloudEmail Basic or Suite service and then
click on the Active green text as shown by the arrow below. 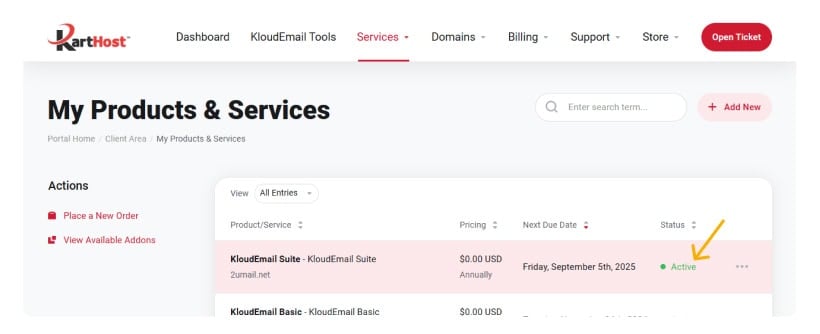
C) After arriving at your KloudEmail Basic or Suite Product/Services page, if needed, scroll down and under Manage, click on the
Managing Mailboxes button.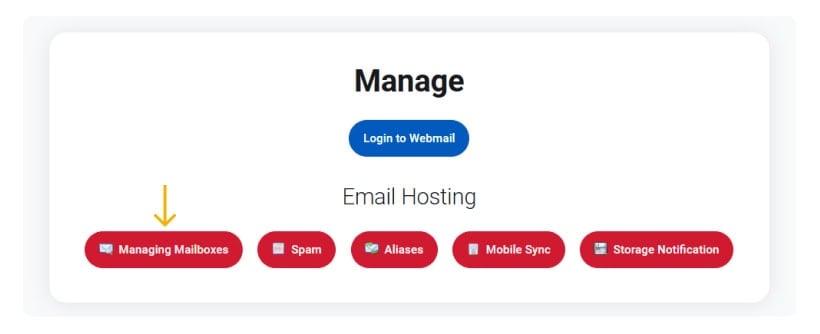
D) On the Manage Mailboxes page, if this is a new service for you, no mailboxes will be showing. If you are adding
a mailbox to an existing service, you will see the other mailboxes listed.
As pointed out, click the Add Mailbox button.
(Note: If the Add Mailbox button is faded out, you will not have any remaining allocations.
You must either delete an unused mailbox or contact KartHost Sales to increase your mailbox allocation.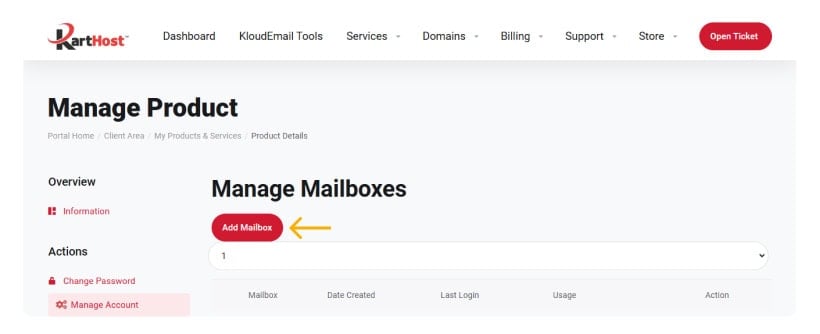
E) You will open up to the Manage Mailboxes page, General tab.
(1) While not required, the First Name and & Last Name can be left blank. However, if you have a business with employees, we
recommend that you add first and last names.
Enter the Username (the username is the part of the email address to the left of the "@" sign).
You can use dots ".", dashes "-", underscores "_" in your username. Do not include spaces.
(2) Next, enter your password for this mailbox. Do not use the same password as other mailboxes. Keep in mind the password
is usually the weakest link in mailbox security. The goal is to have a strong password.
We have seen way to many bad actors that can break weak passwords that allowed them to gain access to mailboxes and cause big problems.
You will see the Password requirement block when you click on the Password field.
Please Confirm your password before proceeding. Write Down Your Password in a Safe Place—you will need again in the future.
(3) Once you are satisfied, you can click the Save button to create your new mailbox.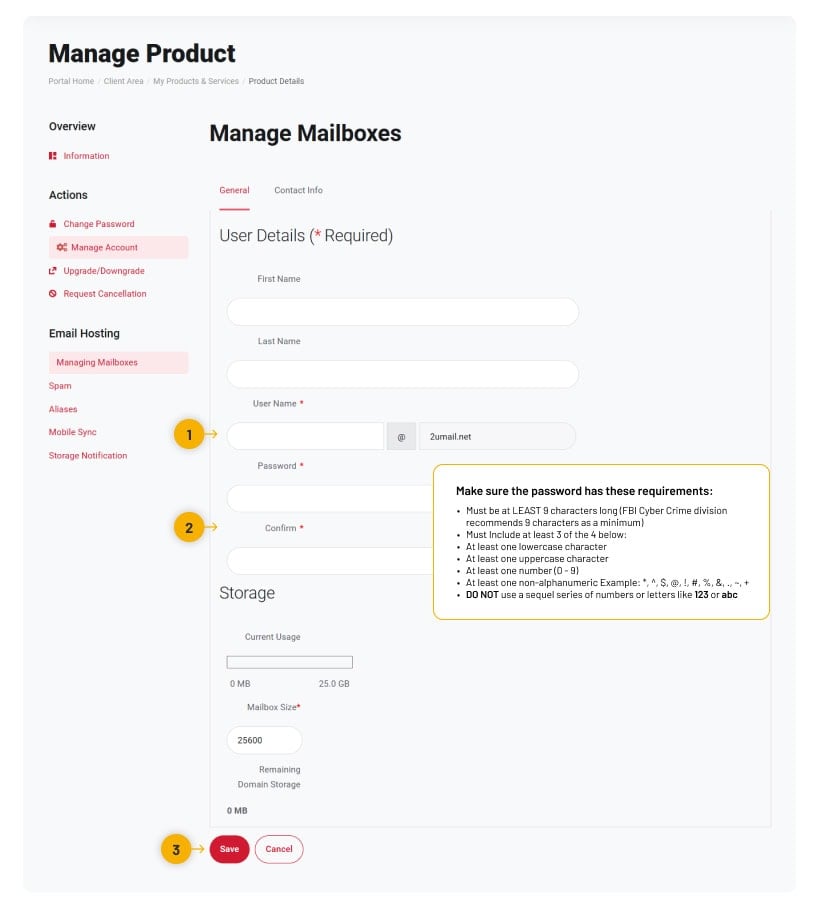
F) After saving, you will see the green banner confirming that your new mailbox has been created. Notice that it can take a few minutes
before the mailbox is ready to use. 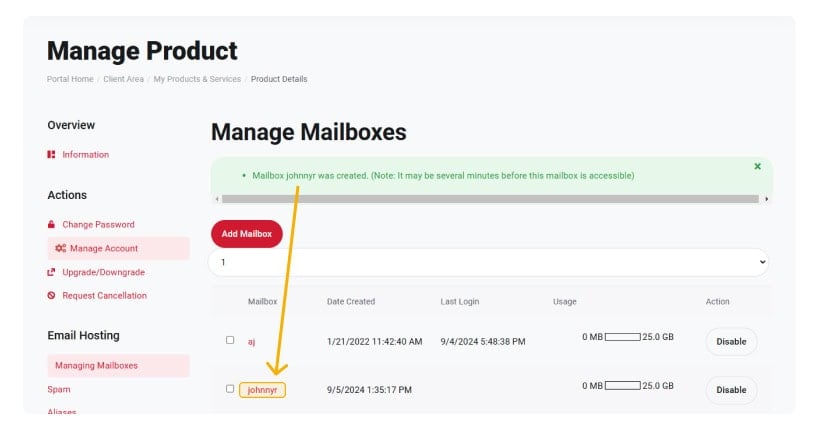
To Access your new mailbox after set up, you can head over to KloudEmail Webmail to attempt to login into your new
email account.
If you wish to add your email to your phone, tablet, or Outlook (Apple Mail, Thunderbird, Mailbird, eM, or any other email client),
visit the Support Center (Setup Wizard) for instructions to set up your device. Just login with your new email address and password.
End of Tutorial
Learn More about KloudEmail & Order your Custome Email Service today at these links:
KloudEmail Comparison
KloudEmail Suite
KloudEmail Basic


