WordPress does not have an autolock out all of its own (as of version 3.5.2). There are many different autolock out plugins usually part of a Security Plugin you can get for WordPress. I will not deal with them all here. The one I will focus on is Wordpress Plugin BulletProof Security (free .48.8 and Pro addition).
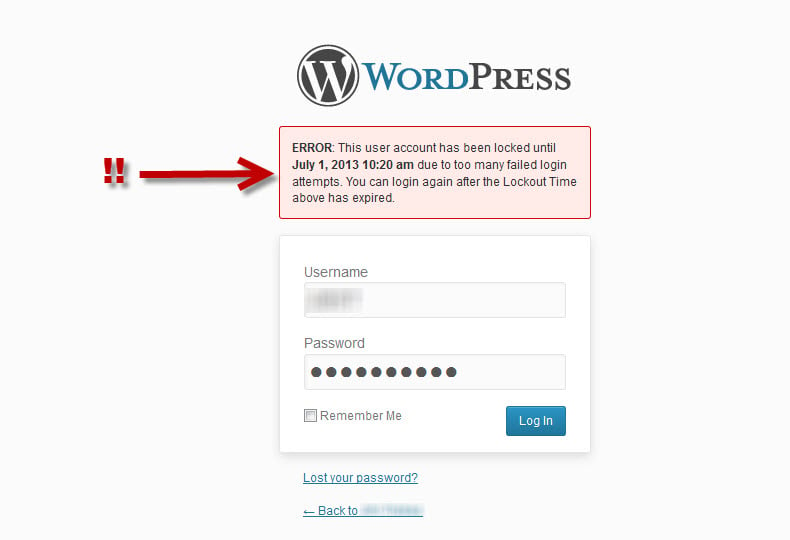
If you have found yourself locked out of WordPress and you have waited the estimated time to be unlocked and you are still locked out, don't worry, this can be easily resolved if you have access to either FTP or your cPanel Control Panel (or another web hosting control panel). While I prefer using FTP, in this tutorial we will use the File Manager in cPanel as it will be easier tool to use in this case.
Â
BEFORE YOU GET STARTED BACKUP YOUR SITE FILES AND YOUR WORDPRESS Database!
1) Login to your cPanel Control Panel (you can do this via your KartHost Customer Center home page and the Quick Login tab)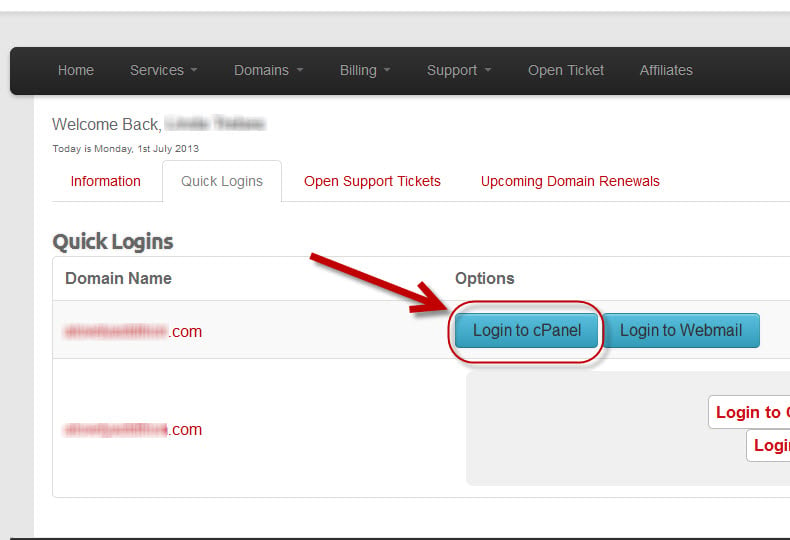
2) Once Logged in to cPanel go to the Files block and click on "File Manager" and check "Document Root for:" and select the domain (web site) inwhich you wish to work. Then make sure to check "Show Hidden Files (dotfiles)" so you will be able to see your .htaccess file in file manager. Â And click the "Go" button and a new web browser window will be open in the file manager.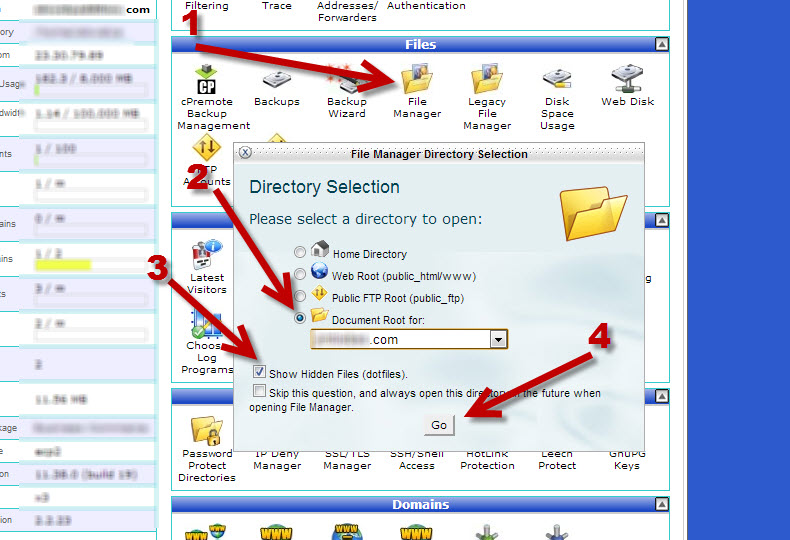
3) Now that the File Manager is open you will want to locate the blue folder (directory) next to wp-content and click on it. Now click on the "plugins" blue folder to open that directory. Now click on the blue folder next to "bulletproof-security". Now click on the blue folder next to "admin". Now click on the blue folder next to "htaccess". Now you have "drilled down" to the /wp-content/plugins/bulletproof-security/admin/htaccess/ directory and you will want to look for the bpsunlock.php file, to the left of it will be a "PHP" icon no the blue folder since this is a file, not a folder (directory).
4) Now we need to highlight the bpsunlock.php file and copy it and paste a copy of it in the root directory of your web site. (See instructions in 4A if this install is a cPanel Addon domain).
Remember we are ONLY COPING NOT MOVING this file. Here is how to do it
i) Highlight the bpsunlock.php file
ii) With the bpsunlock.php highlighted You will not hold down the "CTRL" key on your keyboard then left click your mouse and now simply drag and drop the file to the public_html directory on the left column of the File Manager.  IMPORTANT: You MUST hold down the "CTRL" key at the same time as you hold down the left mouce key other wise you will be moving the file out of the directory not leaving a copy.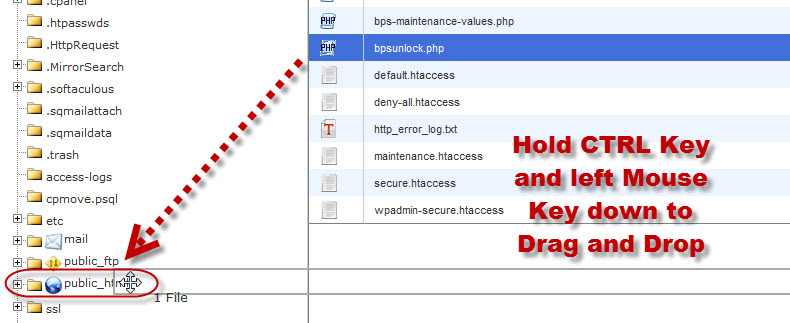
4A) IF YOUR SITE IS an ADDON DOMAIN - Instead of moving it to just the public_html directory, you will need to check the little  "+" sign in front of the public_html directory and locate the directory that is your Addon domain. For example, if its mysite.com, look for the directory "mysite.com" and drag and drop the bpsunlock.php file into it instead, as that is your root directory for "mysite.com" (of course replace mysite.com with your real domain name).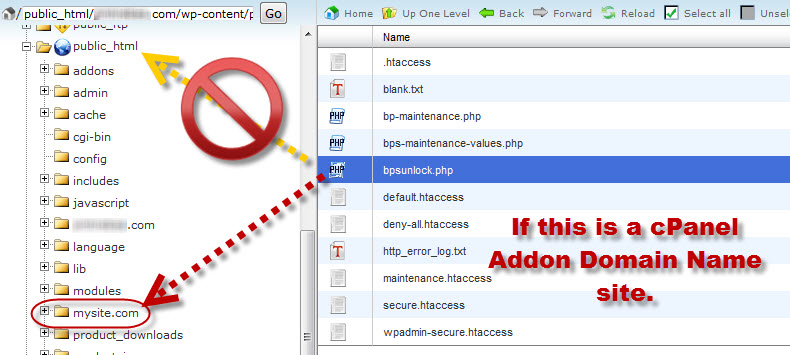
5) Now for Step 6 we will need to get the name of our WordPress Database, the Database Username, the Username Password, Database Host, Database Table Prefix and also the WordPress username you're trying to login with. We will simple use the cPanel File Manger to obtain this information. And here are the simple steps to obtain the information:
i) With File Manager Open click on the public_html directory (or your site name if its an Addon domain). This will take you back to your web root (/public_html) directory (folder) for your WordPress site.
ii) Now you need to scroll down and look for the wp-config.php file. Once you find it click on the PHP icon to the left of the file name to highlight it.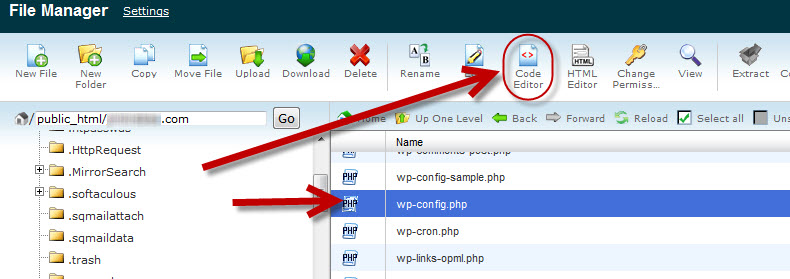
iii) Now with the wp-config.php file highlighted on the File Manager header click on the "Code Editor" icon.
iv) Now the Code Editor box will appear and just click on the Edit Button at the bottom right of the pop up box.
WARNING:Â IF YOU MAKE ANY CHANGES TO THIS FILE BY MISTAKE (You did remember to Backup your site didn't you?) OR OTHERWISE YOUR WORDPRESS INSTALL WILL NOT WORK. SO WHEN YOU ARE FINISHED MAKE SURE TO CLICK THE Code Editor BUTTON "Close"Â NOTÂ "Save Changes" AND IF YOU DID MAKE ANY UNNOTICED CHANGES THEY WILL NOT BE SAVED. If using FTP to access, MAKE A BACKUP OF YOUR wp-config.php file.
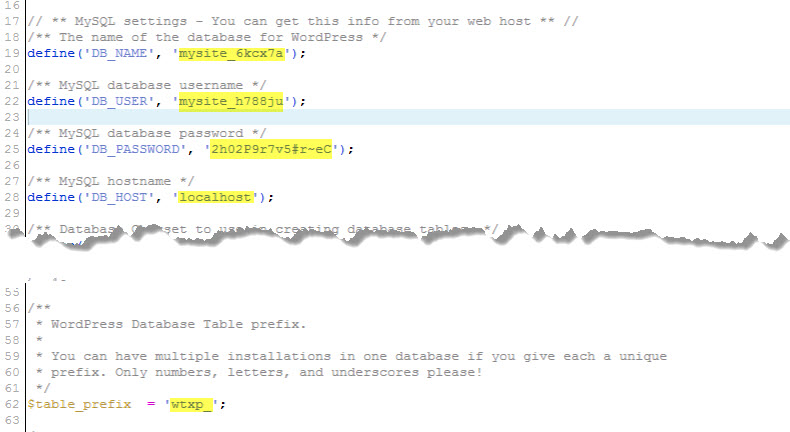
v) Now with the Editor open you will see what is actually in the wp-config.php file. And what you are looking for is the following:
Database Name: Â Â define('DB_NAME', 'mysite_6kcx7a');
mysite_6kcx7a  Â
copy that name and make sure to no include the ' Â ' Â before and after all all names.
Database Username:Â define('DB_USER', 'mysite_h788ju');
The actual username in this example is:Â mysite_h788ju
Database Username Password: define('DB_PASSWORD', '2h02P9r7v5#r~eC');
The actual username in this example is:Â localhost
(Note: if the host name is "localhost" all that means is the web site and MySQL database is on the same server. If it has a different name or IP address that means the MySQL database is on a dedicated server, which is the case of our Managed WordPress sites.
Now the last item you will need is the MySQL server prefix, and the default prefix is "wp_" but a secure prefix that will improve the security of your WordPress install will look differently, could look like this "wp_kjgholklrj_" or an number of ways if WordPress was truly installed securly.
Here is what to look for (and we will assume its the standard WordPress prefix): $table_prefix  = 'wp_';
so just copy the "wp_"Â
Now you have all your information you need for Step 6
6) Now you should have the  bpsunlock.php file moved and you copied or have open the cPanel File Manager Code Editor. You will need to open your web browser and point your web browser to your domain name followed by the slash "/" and name of the file you moved. So in this case, I will pretend your site domain is www.mysite.com, type this in your web browser Address window (NOT a Search window)  www.mysite.com/bpsunlock.phpÂ
When you do you should see what looks the image below. Fill in the details
Remember DB is "database"Â
Once you filled in the fields click on the "Unlock User Account" Button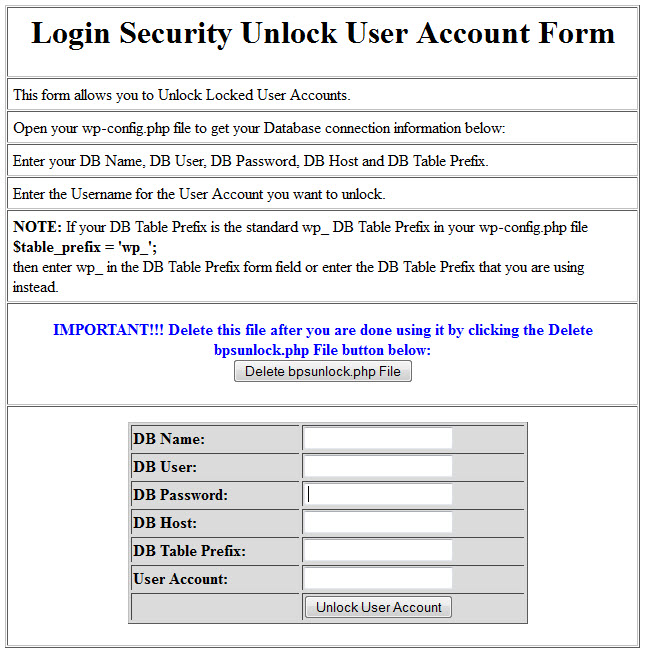
7) Now after you have clicked on the "Unlock User Account" Button your WordPress username should be unlocked at this time. Go try it and attempt to login. Â
MAKE SURE TO CLICK THE "Delete bpsunlock.pgp File" button to delete the bpsunlock.php file in the root directory of your WordPress site, otherwise this will be a security issue!!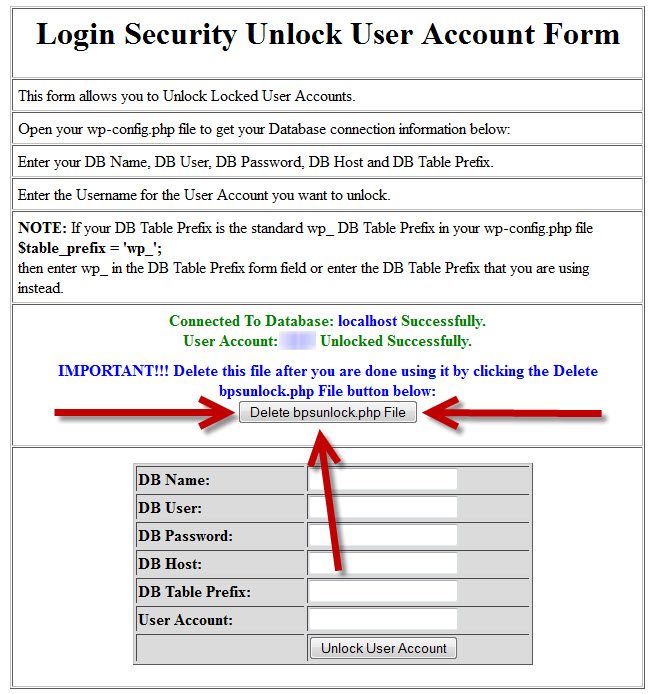
Hopefully you have been successful unlocking your WordPress user. If not, and you need additional help with this, you might check the official BulletProof site for full support. Here is the link to the Support Forums at AIT PRO web site home of the BulletProof Security WordPress Plugin.
END OF TUTORIAL
Â


