If you are unsure what a Favicon is, or why you would want one for your WordPress site, visit this article first Why add a Favicon to Your WordPress Website? Then come here for instructions to add a Favicon to your WordPress website.
If your website is built with WordPress, adding a Favicon is easy. But before you begin, you will need an image minimum size of 512 x 512 pixels (px) to load to your site. Then save your image as a .png file. Highly recommend the background of your image is transparent. This is recommended but not required.
Remember that this image will be shrunk to 16 x 16 pixels, so do not place a lot of detail in the file you create.
Now with your image ready to upload, let's start the tutorial.
Step 1 - We will be placing an image in your WordPress site to generate a favicon to replace the default WordPress favicon as shown below.
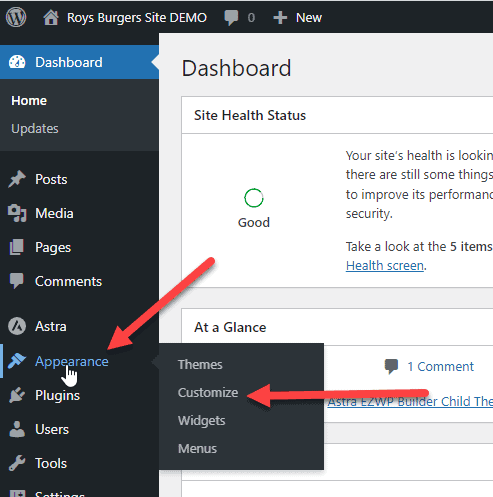
To begin, login to your website's WordPress Dashboard (Admin area).
Step 2 - Once logged in to your WordPress site, look on the left navigation for Appearance > Customize
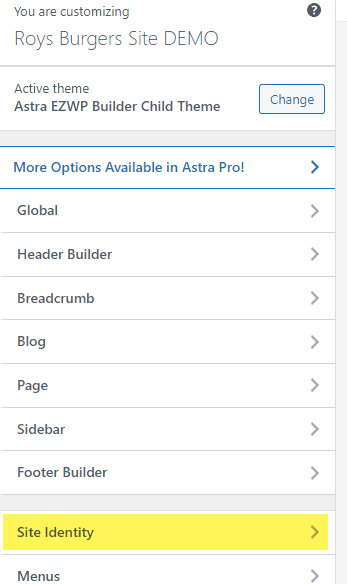
Step 3 - Once in the Customizer for your Theme (it could look slightly different, we are working with the very popular Astra Theme). look for Site Identity. Click it.
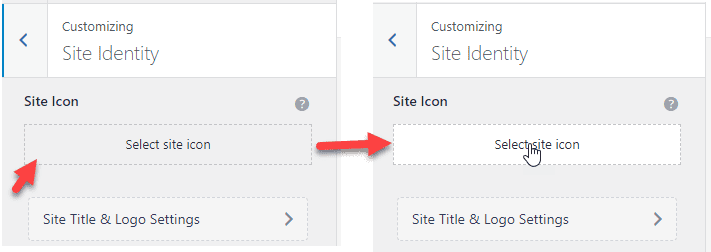
Step 4 - Once in Site Identity, look for "Select site Icon" and then click on "Select site icon"
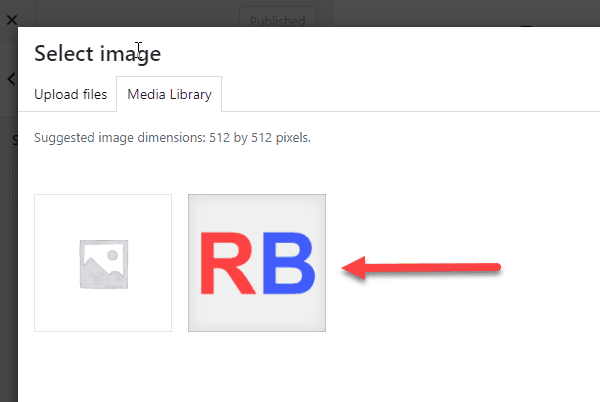
Step 5 - After clicking "Select site icon," this will open your WordPress Media Library. Locate the image you will use for your site icon if you haven't uploaded your image yet. You can do it now by simply dragging your image off your computer to your site's Media Library. NOTE: Not shown in below image at the bottom right click to use the image, next you might be taken to a page to crop the image. If you upload a prepared image you will not need to crop. Just skip the cropping step.
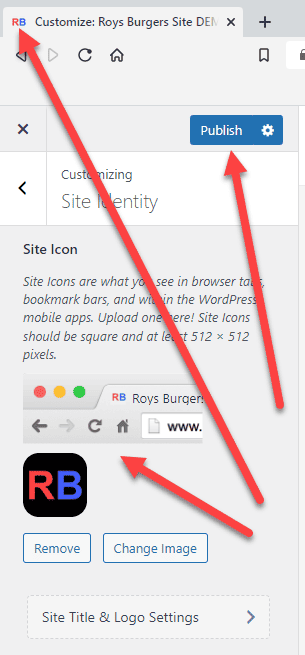
Step 6 - You will be taken back to the Site Identity page showing your new Favicon in the Tab window of your web browser. Make sure to click Publish or you will lose all your work.
BONUS STEP - If you want to take the Favicon to the next level, I recommend using the Favicon by RealFaviconGenerator. It will allow you to expand where your site visitors can place YOUR site's Favicon so they do not forget you. This plugin has a HIGH star value.
Favicon by RealFaviconGenerator
End of Tutorial
EZWP Complete - A Custom Install of WordPress with to all you or your website designer to create any type of website.
updated May 23, 2023


