After you have set up a Mailgun.com Account you will want to login to your WordPress install and load up a WordPress Plugin, it's a free plugin, Post SMTP.
NOTE: If you haven't sent up your Mailgun account yet see this article Mailgun - Steps to set up Your own Account once your account is set up, come back here.
We will assume you have already installed this plugin on your WordPress install.
1) After you install Post SMTP you will notice that the A) alert message in the admin area will be displayed advising you to set up Post SMTP (Postman). B) A notice on the Dashboard will be displayed as well. You can click on "Settings" as shown by A), B) or C) click Post SMTP on the navigation on the left as pointed out by C).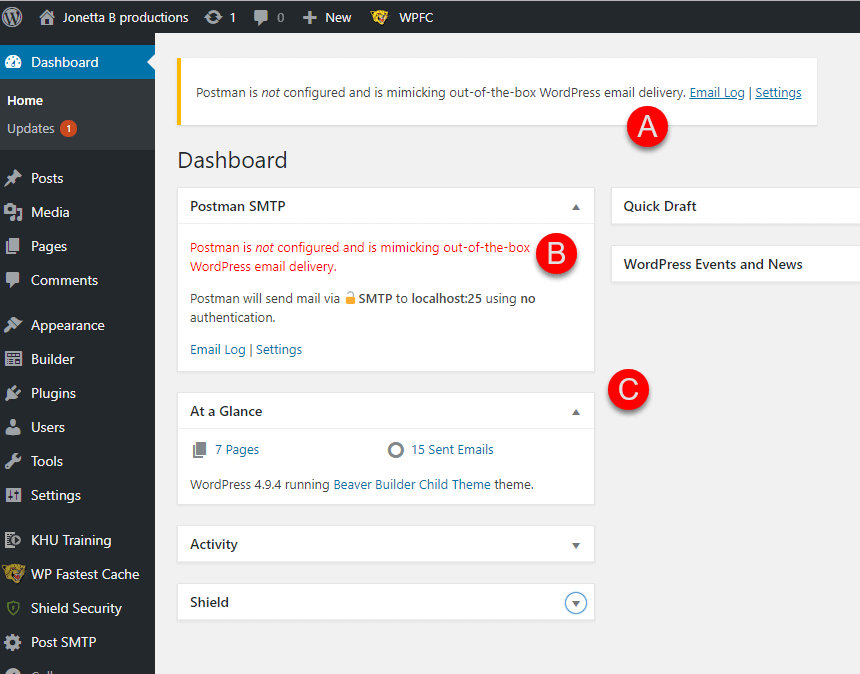
2) Once you have clicked on Post SMTP you will be on the Post SMTP Setup page. Click Start the Wizard blue button.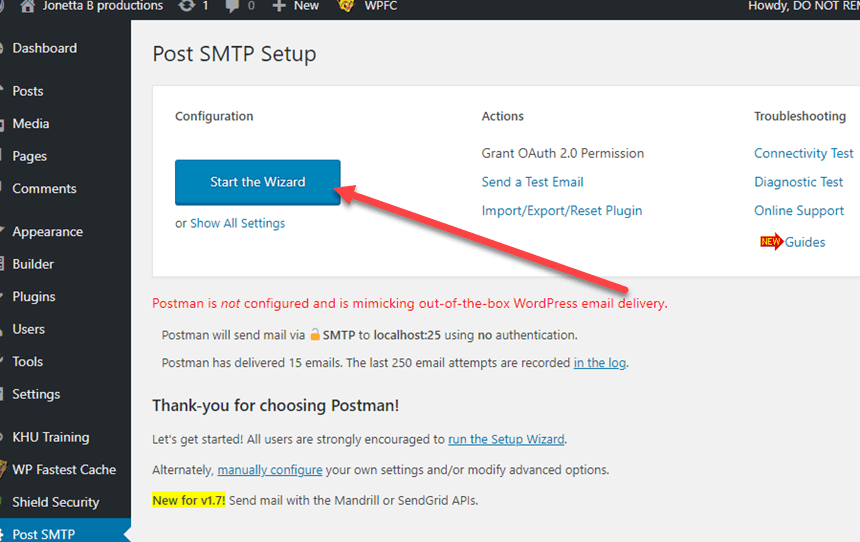
3) On the Senders Details page in the A) 'Email Address' field you will place the email address that when someone replies to the email this is the email address you want the recipient to send too when the recipient replies. IMPORTANT: Make sure it is an email address that matches the domain name of your website. Otherwise, you will increase the chance of the email getting caught as SPAM.
B) The 'Name' field you can place in here anything you want, that looks natural. The name of yourself, your website, your business, whatever the recipient will recognize when they see the email.
C) Now click 'Next' button to continue.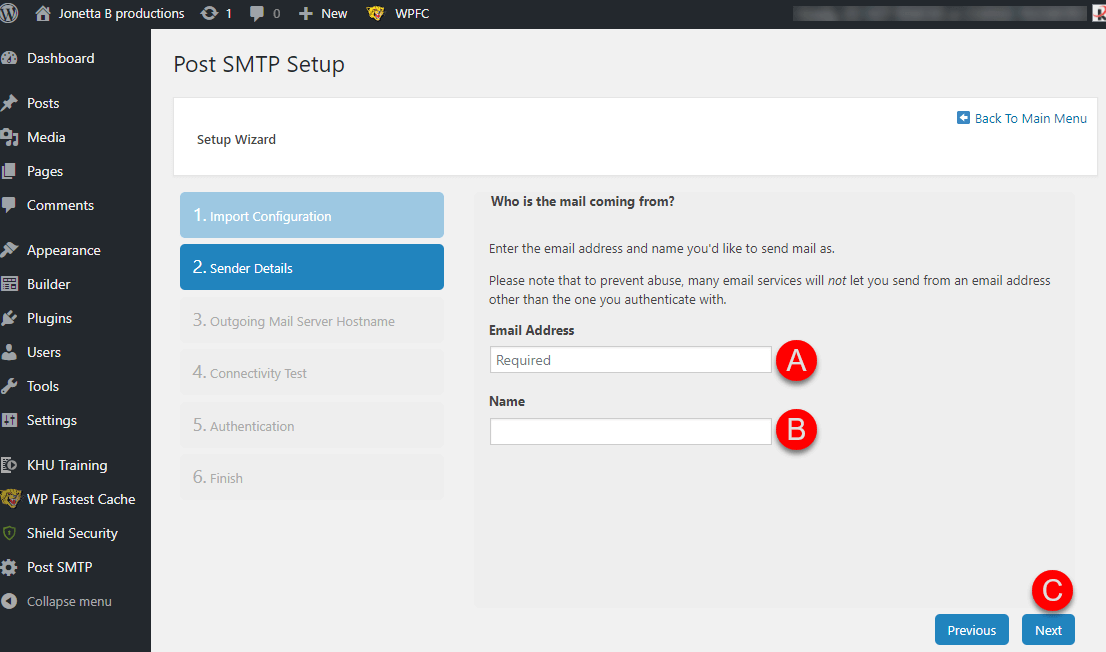
4) On the Outgoing Mail Server Hostname, A) you will need to use the smtp.mailgun.org in Outgoing Mail Server Hostname field (always double check your Mailgun.com account for the latest Outgoing Mail Server Hostname). B) Then click the 'Next' button.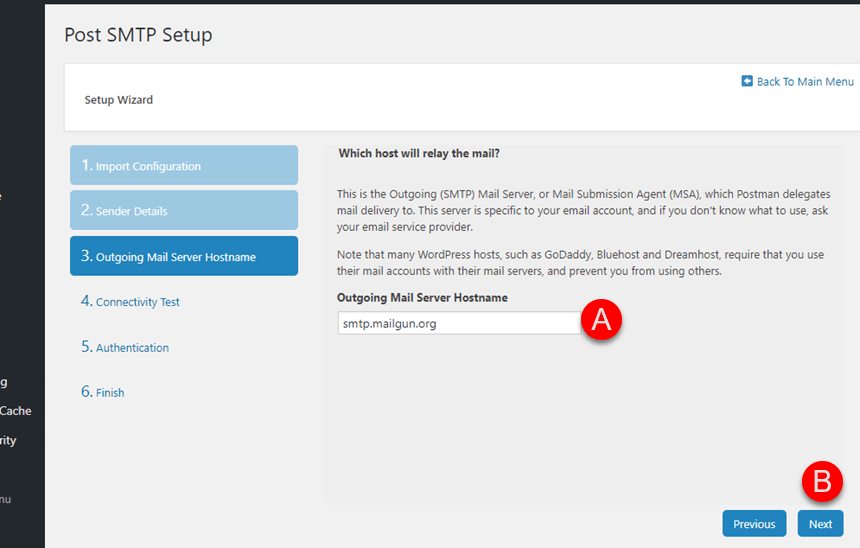
5) Connectivity Test. It will take 30 seconds to as long as 2 minutes for Post SMTP to check to see what "options" you have available. More than likely the default setting will show SMTP - mailgun.org:587. You can leave it here, but we RECOMMEND you select A) "Mailgun API" as our instructions will assume you will. B) Click 'Next'.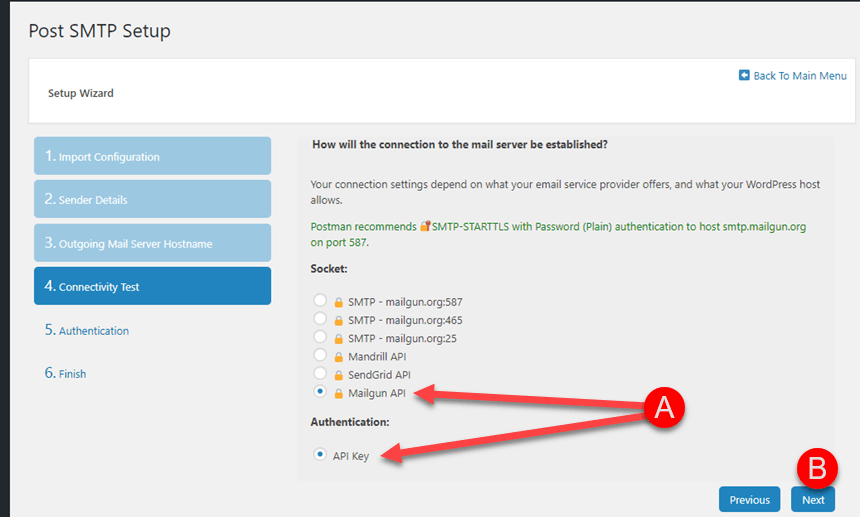
6) You will now need to get your A) Mailgun API Key (from your Mailgun account) and B) the domain name you are using to send an email with which should be the same domain name of your website*. (Within Mailgun click on 'Domains' then on the actual Domain Name you will be using. And you will see API Key under Domain Information.) C) Once you fill in both Fields you will click 'Next'.'
*Note: If your website uses "www." in front of your domain name do NOT add "www." just your root domain.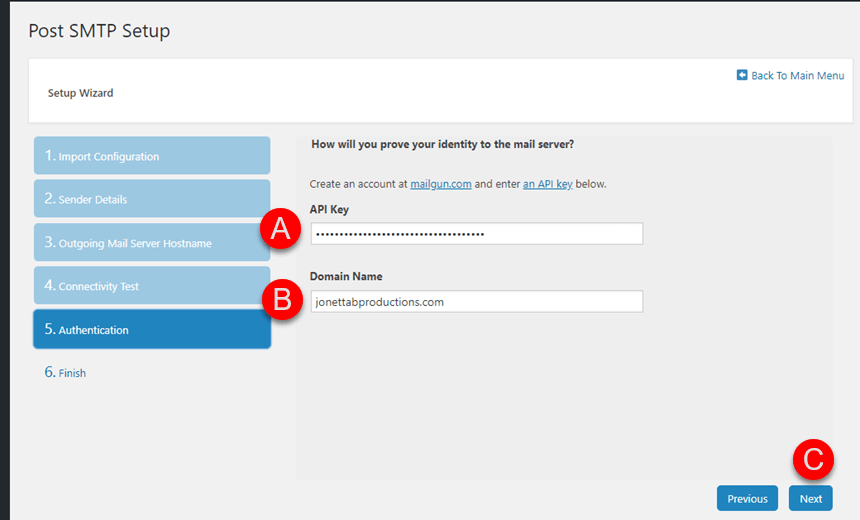
7) Now you will be on the "You're Done!" Click "Finish" button. You will want to send a Test Email to make sure all is working.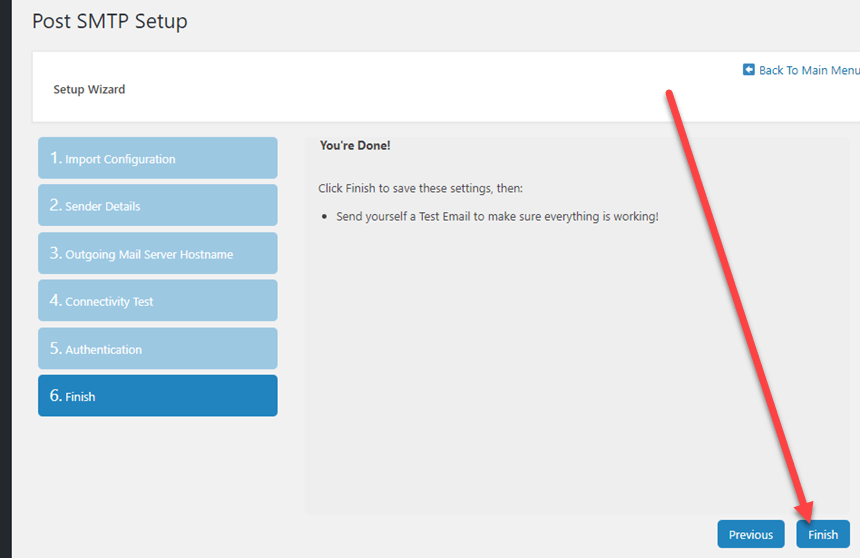
8) You will then want to click "Send a Test Email" to test your set up.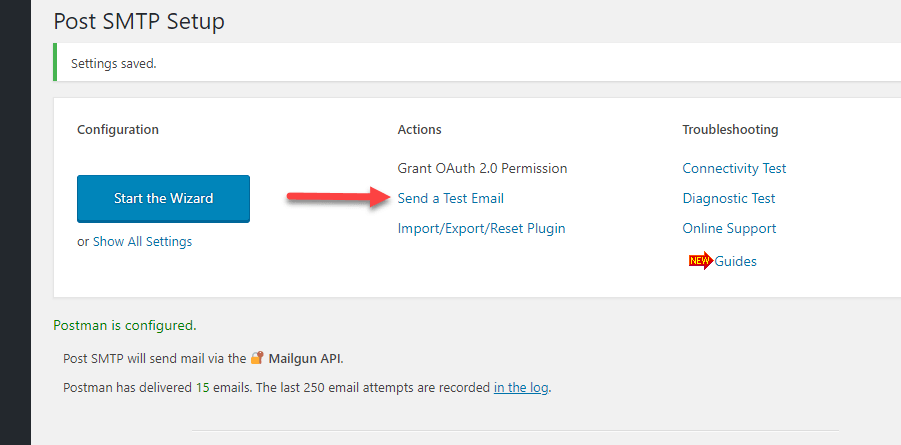
9) Specify the Recipient - A) type in your email address for this test. So type your email address you wish the test email should go to. It can be any email. B) Click Next button.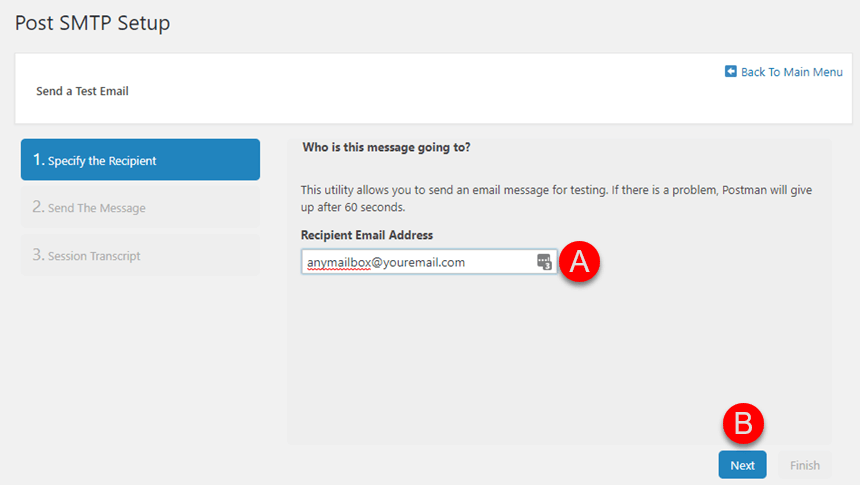
10) Send the Test - Failed - A) If for some reason your test email Fails you will see the below. B) The Status box will show WHY it failed. In this example, the API key was invalid. Reasons, maybe your Mailgun account wasn't verified, or Domain Name hasn't been verified yes by the DNS entries. Or you could have just copied over the API Key with spaces in it or didn't copy the entire API Key.
TIP: Copy your API Key into NotePad (for Windows) or TextEdit (for Mac) to make sure you copied correctly then copy into the API Key Field.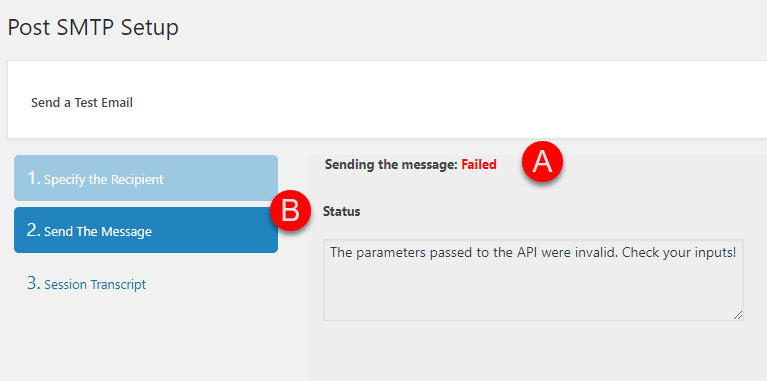
11) Send the Test - Success - A) If your message was sent successfully you will see the Success message and below in the Status box the details of the successful message being sent and how long it took (FYI: 1000 milliseconds (ms) = 1 second) B) Go ahead and click the Finish button when done.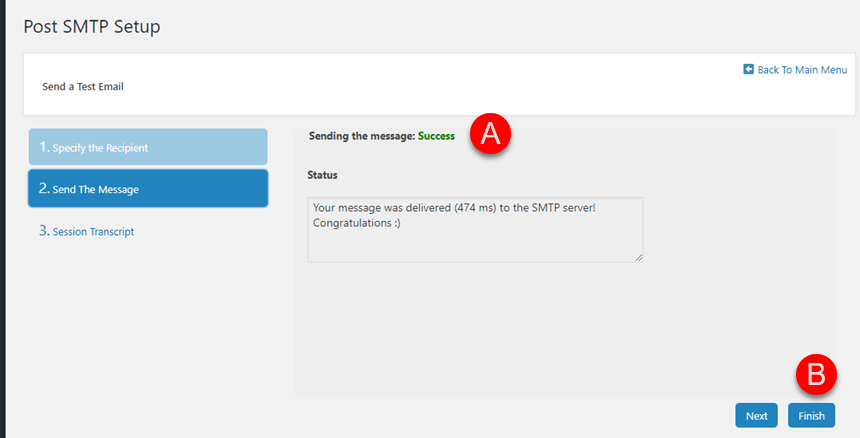
12) The TEST Email you receive should look something like this: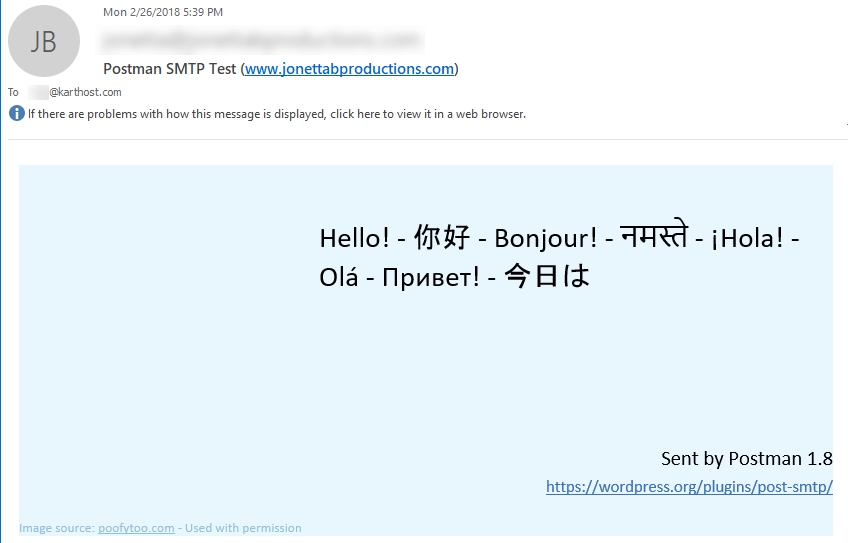
END OF TUTORIAL.
Need Solid and Reputable WordPress Hosting?
Check out KartHost
Managed WordPress Hosting
Self Managed WordPress Hosting
Last Edited: February 27, 2018


